Sunday 7 May 2017

How to get free Azure credits for more than one month and use them efficiently

Introduction
A good way to learn about cloud development is building prototypes. The most important thing that you need when you want you want to build prototypes in the cloud is a cloud environment and preferably at an affordable price. How does the cost of a cloud environment compare to building prototypes on your local machine?
When you are building prototypes on your local machine, you have first invested in your hardware, your computer and depending on the prototype you want to develop you have invested a certain amount of money in software. Next you are still have your monthly costs like your internet connection and your electricity bill. This means that you immediately know how much you are spending.
When  you are building prototypes in the cloud, you initially start with a low bill, because you have more a pay as you go model, but if you don't pay attention this bill can grow faster than the amount that you would have invested in your bare metal locally. You have however the possibility to play with technologies that are not easily available on your desktop environment. Examples of these are machine learning software and business intelligence solutions.
In this blog post I will go more into detail about how you can get free cloud credits for Azure and things to consider when you are building prototypes with virtual machines.

On a quest for credits
Initially, when I started with building prototypes for the cloud I used a mix of emulators, Azure Machine Learning Studio and the Azure free trial credits for one month of $200. However to keep building prototypes on a continuous basis I needed a more long term supply of credits. Luckily after an extra search on the internet I found the Visual Studio Dev Essentials program. This program provides a lot of free resources for developers but the most important aspect for me were the  $25 or 40 CAD of Azure credits a month for one year. 
In the rest of this blog post I will describe some lessons learnt using these credits in the most optimal way. I will focus on Virtual Machines in this blog post and how the Azure Portal also will help you to identify the highest costs of your cloud consumption.

How the portal tracks the consumption of your monthly credits
The Azure Portal tracks the amount of credits that you have used and makes a forecast about the credits that you will use by the end of the billing period. It also provides a breakdown about the resources that are using the most.
By inspecting these costs on a daily basis you can adjust your spending costs. Next you can also validate whether you really understand how your are spending your credits. For example if you have deleted or stopped a resource and your spending is still not significantly lower, you might still have some ghost parts of this resource living in your Azure account and eating away your credits.


How to optimize the cost of Virtual Machines
What do we want to learn from experimenting with Virtual Machines in the cloud?
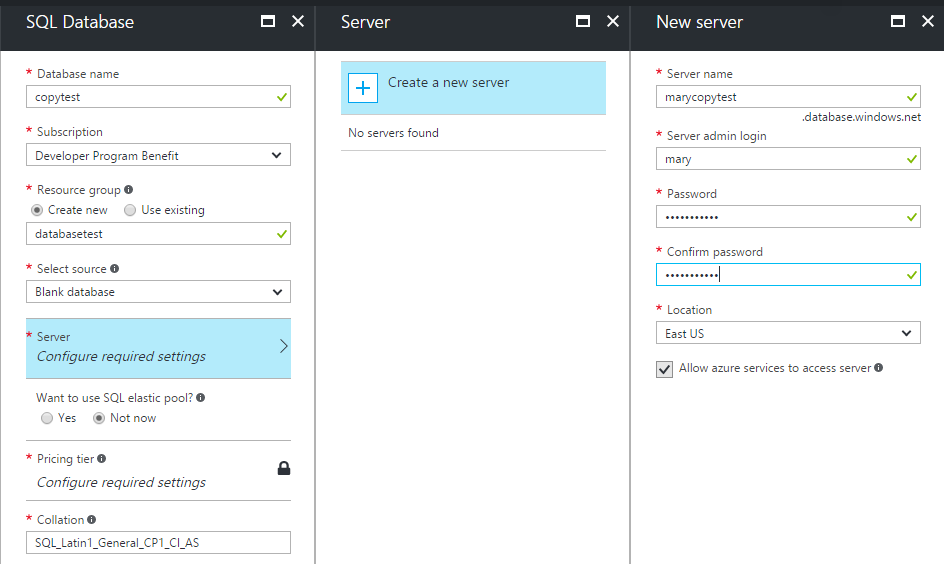
In Azure you can choose from various versions of both Windows and Linux operating systems. You can also select the flavor that you want and you need to select different options like the type of drives for the virtual machine, the region and the size and the cost of the virtual machine. Finally you can still select some extra options like the use of managed disks, the availability set and a diagnostic storage account that might add in extra costs.
   
What is the most cost effective option?
It is important that you have a clear goal about what you want to achieve with the prototype that you are building when you are selecting you virtual machines. For example if you want to understand the various ways about how to connect with a virtual machine or want to experiment with Network interfaces, you don't need a machine with 14 GB of memory, 2 cores and 4 data disks. In the beginning of the billing period you also want to be more more conservative than the end of the billing period. If you however have a more computing intensive project in mind working with more computing power might reduce the number of resources that you are spending.

Be careful when selecting the size of your VM
One of the first things that I learnt was that when you are selecting the size of your virtual machine, don't select one of the recommended options as you can see below. However select the View all option in the upper right corner.

Next scroll down and you will be presented with the A0 Basic and the A1 Basic which are more affordable options to play with. If these cheap options are not available. Select another region for your virtual machine till you have found the A0 and A1 options.


Understand the charges when a virtual machine is turned off
You can turn off a virtual machine from the Azure Portal and in this case nothing is being charged for the compute hours. When you turn on and off your local machine, you expect it still to work. This means that your operating system and all the the software is still left on your drives. In the cloud this means that you need to keep paying for the storage of your virtual machine. 
There are different types of availability and redundancy that can influence the cost significantly. When you also want to make sure that your disk are safe from disaster, you also will need to add in extra backup options.
Next you can also add extra data disks to your virtual machine, these disks are persistent when your virtual machine has been deleted. So make sure also to delete these disks in case that you don't need them any more. Therefore when you have deleted a virtual, make sure that you keep monitoring the costs and that you are seeing the cost reduction that you expected.
Finally there are also still some costs involved with the public ips for the various virtual machines. However the costs of these are small in comparison with the disks. But when you want to remove all the traces from a virtual machine, you will need to delete these ones separately. 

Conclusion
In this blog post we discussed a strategy that gives you free cloud credits for a year. Next we discussed how you can use these cloud credits in an optimal way when you are using virtual machines in the cloud. Good luck with your journey to the cloud.

Sunday 2 April 2017

An easy trick to get a csv-file in Azure SQL Server with Azure Machine Learning Studio without coding

Introduction
In this blog post I will describe a method that you can use to import a local csv-file to the cloud in Azure SQL Server without writing any code. Although you can also do this with SQL Server Management Studio (SSMS), this is not always an easy option for example if you don't have SQL Server Management Studio available because you are working on a Mac or a Linux computer. Another reason might be that you are working from another location than usual and your IP hasn't been granted permission to access the Azure SQL Server database.


In the rest of this post, I will explain how you can execute this trick yourself. The most important things that you will need are a csv file, Azure Machine Learning Studio and a subscription to Azure. If you have already deployed an Azure SQL Database in the cloud, you can fast forward to forward to Preparing Azure Machine Learning Studio.


Make a SQL Database in the Azure Portal


We first make a database from the Azure Portal. We are going to use this database to build a prototype and the main functionality that we need is to access the database, to perform an INSERT and a SELECT statement.  Therefore, we will generate the least expensive database. 
We login to the Azure Portal and we select SQL databases from the left column in the portal. This brings us to the configuration screen as we can see below and we make the choices to define the name of the database and define a server where the database will live.


Next we will need to make a choice about the cost of the database. You can make a choice between Basic, Standard, Premium and PremiumRS. You can select both the Database Transaction Units (DTU) which determine the computational speed and the storage which determines the space that your database will use. For this experiment we will work with the Basic option and we select the lowest DTU and we will keep the suggested storage space. The cost of this database is 6.07 CAD a month. 


When you have put in all these configurations it is a good idea to select the Pin to Dashboard checkbox. This allows you to easily monitor the progress of the deployment of a resource or another action that you initiated in Azure. Just wait a few minutes and your database will be deployed to Azure.


Preparing Azure Machine Learning Studio
Uploading your local file to the cloud as a dataset
First, you will need to login to Azure Machine Learning Studio. In case you haven't used this before you can use the same Microsoft account that you use for your Azure account. If you select the Free Workspace, there will be no extra charges involved for using Azure Machine Learning Studio.


First you want to make a dataset in Azure Machine Learning Studio from your csv-file. This will mean that your dataset will be stored in your datadrive that belongs to your Azure Machine Learning account Studio. Therefore, select DATASETS in the left column.  Next you can make a new dataset by selecting the + NEW button on the bottom of the page. After you have clicked this button, you will be able to upload your csv-file to the cloud.


Building the Experiment that uploads the csv file to the database
Now, let's switch in Azure Machine Learning Studio to Experiments in the left column and create a new Experiment by clicking on the + NEW button on the bottom of the screen. In the wizard that follows, you can select "Blank experiment".


You can drag over your csv-file to the middle of the page. If you right click on the circled 1 you can select Visualize.


We now see an overview of the dataset and we can visually inspect whether the data has been imported correctly.


Now we will add in a Column Selector that will select all the columns that we want to transfer to the database.


Finally we will select an Export Data box and our experiment will look as below.


To make the red exclamation mark disappear you will need to provide the information of your database. With Data table name you can name the resulting table name in the database, in case this table is not available yet it will be automatically generated.


When the red exclamation mark has disappeared, you can run the experiment by selecting the RUN button in Azure Machine Learning Studio. In case you run into errors, make sure to check whether your have written down the column names correctly or whether you have made some typos in your password.

Validation that the data has arrived in your database
Create now a new experiment and drag an import button to this experiment and configure this again that you will be able to access your Azure SQL Database. Type a simple select statement as your database query.


Press the RUN button again and select next Visualize from he Circled 1. You will see that you now can retrieve the information from your csv-file from the database.


Conclusion
Today, we discussed today a strategy to upload a local csv-file into a table in Azure SQL Server with an uncommon use of Azure Machine Learning Studio. For another Azure Machine Learning Studio hack see


Sunday 26 March 2017

Some Azure security settings don't really mean what you think they mean

Introduction
In today's blog we will focus on how to reset a public key for a Linux VM in Azure. Spoiler Alert!!! Using the Reset password functionality from the Azure Portal doesn't have the functionality that you would expect from a password reset. We will explain this further in this blog.
First, we will explain how you generate a VM with public key access in the Azure portal. Next, we will explain what happens when you reset your public key for a VM using the Reset Password functionality in the portal. Next we will explain how you can actually remove the previous public key to get a complete reset functionality. Finally we will also explain what happens with the public keys when a VM gets redeployed.


Setting up a Linux VM in Azure through the portal
How to setup the VM
To setup a Linux VM in Azure, you can go to the Azure Portal. For the Authentication Type you can choose SSH public key. To generate a public/private key pair you can use for example PuTTYgen. You can next choose all the other parts of the VM. In the portal you also need the username that will use the VM. In this example we will use the username mary and Mary will provide her first public key mary1.


Logging in to the VM
You can next choose the ssh client of your choice to access the VM when you provide the IP of the machine together with the private key that corresponds with the public key pair. In this way we can successfully log into the machine.

What happened behind the scenes?
When you use the SSH public key authentication type when you generate your VM, two things happen behind the scene.
1. In your VM, a .ssh directory has been  generated. In this .ssh directory, a file authorized_keys has been generated. In this file you will see the public key that you provided in the Portal.


2. In the Portal under the Automation script tab, various templates were generated. You can use these templates later on when you want to automate the deployment of your VMs. In the picture below you can see a fragment from the Template file and you can see in the highlighted osProfile section that the user mary can log in with the provided public key and that password authentication has been disabled.


Sometime bad things happen
Unfortunately your laptop on which you had installed your keys got stolen and therefore you need to reset all your passwords and off course you also need to revoke public key access for your public keys that you had on your VM.

Resetting the public key through the Azure Portal 
The steps to follow in the portal
When you go to the Azure Portal and go to your VM, you can select Reset password from the left column. In the screenshot below you can see the information that is provided to you and the information that you need to fill in to reset your public key. In this case we have added in public key mary2.


Logging in with key mary2

We use the mary2 key to login and we can happily login to our VM.


Logging in with key mary1
Unfortunately, the person who stole your laptop was able to extract the key because no full disk encryption was used. Contrary to what you expect the key still works and he has access to your vm in the cloud.


What happened behind the scenes?
1. The public key that you provide through the Azure Portal gets added to the authorized_keys file. However, the original public key has not been removed. Therefore you can keep using this key to access the VM.


2. In the Portal in the Automation script you will see that there is still being referred to the first public key. Notice that just copying over this information to deploy a new virtual machine might allow the laptop thief again to gain access.


How to do a "real" reset?
The easiest way to do a real reset of the ssh key, is to log in to the VM and remove the previous public key from the authorized key file. The automated script will however still look the same as above. Also make sure that you put in comments that start with # in your authorized_key file so that you know which public keys are used for what purpose.

What happens after a redeploy of the virtual machine?
When you redeploy your virtual machine, the active authorized_key file is copied over during deployment. So if you could login with key1, key2 and key3 before deployment. You can also still login with key1, key2 and key3. These keys can either be added in the authorized_key file through the VM itself or they can be added to the VM by the Reset functionality of the portal. 
However deploying of  your VM might result in downtime of the machine and in loss of data. Therefore we will go in further detail about what happens with your VM when you redeploy in a later blog post.

Conclusion
In this blog post we have learnt how you can reset the public key that you use to gain access through a Linux VM in Azure. This consists of two steps. The first one is going to VM in the portal and use the Reset password functionality to add an extra public key. If you want to disable the previous public key from the authorized_keys file. You next will need to log in into the VM and remove the previous public key. When a VM is redeployed all the public keys from the authorized_keys file will provide access after the redeployment. In a later blog post we will focus on what happens behind the scenes when a VM is redeployed in Azure. In another upcoming blog post we will discuss how you can switch from password access to a VM to access to a VM with a public key.


Friday 10 March 2017

How to call a web service generated from Azure Machine Learning Studio From Ruby

Background Note
This blog post is the last post in a series about how to get started to build a data architecture in the cloud. The architecture is described in the first blog post. This series features two people, Dana Simpsons the data scientist and Frank Steve Davidson the full stack developer, who are building their own SaaS company that will build games based on data science. In this blog post we will describe how Frank can call the web service that Dana generated in Azure Machine Learning Studio from Ruby.

Position in the architecture
Frank wants to run the web service that Dana built in Azure Machine Learning Studio. To be able to use this web service, the files that he is providing as input and the files that he gets as output need to be stored in the cloud, so in blob storage. He already knows how to handle these files in the cloud, as we described in a previous post. So therefore he only will need to focus on how to feed and call the web service and how to extract the results from the web service. The major challenge for Frank was also that there was no automatically generated stub available to call a web service from Azure ML for Ruby. This is the case for Python, C# and R. 


Understanding the payload
In the picture below, we see again how Dana sees her experiment in Azure ML. On top, we have the input file in blue and on the bottom we have all the different output files.
Frank will need to build a json object that looks like the Sample Request Payload below. The top blue box presents the input file. The bottom blue boxes present the output files. For the example the output label for the word cloud from the previous blog and the final location of where this file will be stored are annotated in the orange boxes in the picture below. The main goal will be now to generate this json object.


Defining the payload in Ruby
Frank implements now a hash structure, payload_hash in ruby.  For the ConnectionString he looks up again the name of the storage account, and the account key. To be able to distinguish between different runs of the web service he will use a timestamp to have unique names.


Start the web service
To start the web service, Frank needs the API key from the web service and the URI. The API key can be found on the main page of the web service as shown below.

When Dana clicks next on Batch Execution she gets the picture below and there she finds also the Request URI. This is what she will give at Frank.


Armed with all these pieces of information, Frank has now built the Ruby code to call the web service that Dana has built.


While the web service is running
The web service hasn't finished immediately. Therefore, Frank will need to check when the web service is done. You can see the code for this in the code piece below.


I was promised an image?
The goal of this blog was to extract an image from the web service. But currently Frank has only extracted csv files. As you may remember we have connected the right dot to get the output. This is accidentally still called a csv file. But the input itself looks like below.


We now will need to extract the piece with all the funny letter and number combinations that has a graphics title, this will actually be the image file. 


Conclusion
If you have read all the different blogs of this series you have now an idea about the architecture that is involved for building the architecture of a data application in the cloud and what the different tasks are that people need to do that are building this architecture. Thank you very much for reading my blog.

Thursday 9 March 2017

How to use R scripts in Azure Machine Learning Studio and generate a webservice

Background Note
This blog post is the fourth post in a series about how to get started to build a data architecture in the cloud. The architecture is described in the first blog post. This series features two people, Dana Simpsons the data scientist and Frank Steve Davidson the full stack developer, who are building their own SaaS company that will build games based on data science. In this blog post we will describe how Dana will use Azure Machine Learning Studio combined with R to generate the images that Frank will use in the gaming website. In the last blog of this series we will learn how Frank calls this web service.

Introduction to Azure Machine Learning Studio
A good resource to get started with Azure Machine Learning Studio is the free ebook: Microsoft Azure Essentials: Azure Machine Learning. In this blogpost we will focus on the way Dana is working on generating the images for the game website that Dana and Frank are developing. To evaluate Azure Machine Learning Studio, you will need to have a Microsoft Account. You can use this account to log in to http://studio.azureml.net. Exploring Azure Machine Learning Studio is completely free.

Position of this blog in the architecture
Now we will describe the steps that Dana performs to embed her R scripts into Azure Machine Learning Studio and how she will be able to convert the experiments that she makes into a web service so that Frank will be able to use them in the Ruby layer. So the focus of this blog is more on how only a few things are needed so that both Frank and Dana will be able to work with the development tools that they both feel most comfortable with.

Preparing the text to be in the correct format
For this application, Dana started from a book in text format which she converted to a csv file that consists of one column and each row represents one sentence of the text. She did this formatting on her own computer but this can later be automated further in the green block above. 


To be able to use this dataset further, she will upload this csv file as a dataset in Azure ML. So after she has logged in into Azure Ml, she has selected DATASETS in the left column. Next, she clicks on + NEW in the left lower corner and she can upload her dataset to her available datasets in Azure ML. In the picture below you can see all the datasets that she has uploaded in this way.

A high level overview of the experiment
The experiment that she built looks as the picture below. You see that there are two type of boxes, white ones and blue ones. First you only will need to focus on the white boxes. The box containing the text “chapter1_to_5_list.csv” is the box that is selecting the input data set. This dataset is fed to a “Select Column in Dataset”. Next, the output of this data is being fed to several “Execute R Scripts”. These R scripts will be generating the data analysis and the different images that are provided to Frank by the Web service in a next step. 
Now, focus on the blue boxes. You will see that there is one blue box on top which is called Web service input and six blue boxes on the bottom which are called Web service output. When in a next step the web service will be generated from this experiment, random csv files that only have one column can be fed to this web service and the different images can be automatically generated.


A deeper dive into on Execute R Script box
We now look a bit deeper into the calculation of the word cloud that is being performed in the box with the blue border. As you can see in the R code on the right, first the dataset is being selected in dataset1. Next Dana is deleting some common English stopwords to provide a clearer picture about the special words from the book that she will be displaying. Next, she is working further to build a picture of the wordcloud. 
She will right click on the number 2 and will select Visualize. This provides her the output of her R script. Which will look like the picture below. It is important to notice the Graphics title here. In this experiment, she will be generating several graphics and also some extra datasets. When she is happy with her results. She will generate a webservice from this experiment.


The generation of the web service
To generate a web service, she selected, Deploy Web service from the bottom. She also switched the view to the web service view by switching over the slider on the bottom to show the globe. You will see that now the blue boxes of the web service have turned dark blue. There is a curved line from an Execute R Script box to a blue box of the Web service output. When this line starts from the right dot, you will be able to export an image, left dot you will be able to export a csv dataset. Also when you click on a blue box you will be able to provide a meaningful name for the output. 


For their project, Dana and Frank will be working with the Batch Execution mode because they are working with the csv files that will be uploaded. On this page, she will find the API key that she will need to give to Frank.
When she clicks on the Batch Execution mode. She will find the Request URI for the web service that she will need to provide to Frank.
Next, she scrolls down to Sample Request Payload, she can validate that all her different inputs and outputs have been defined properly.


Cost Analysis
Azure Machine Learning Studio has a Free tier that Dana can use for building her current data solutions. For the Web Services, she also still belongs within the DEV/Test limits. All the pricing details can be seen here . The only thing were there will be a cost involved is in the blob storage for the files that will be used as the input and the output for the web service. These are currently 0.01 CAD for using the web service for one book for a bit more than twee weeks.

Conclusion
In this blog post we showed how Azure ML can be used to generate web services on top of the data science experiments that Dana has built. In the next blog, we will show how Frank will call this web service to extract all the different images.

Wednesday 8 March 2017

How to access blob storage with Ruby

Background Note
This blog post is the third post in a series about how to get started to build a data architecture in the cloud. The architecture is described in the first blog post. This series features two people, Dana Simpsons the data scientist and Frank Steve Davidson the full stack developer, who are building their own SaaS company that will build games based on data science. In this blog post we will describe how you can access blob storage in Ruby. In the next blog post of this series you will learn how to use R scripts in Azure Machine Learning Studio.

Position in the architecture
All programs need data at some point. That data can either come from files or from a database. This is not different when your program lives in the cloud. In this case, it also might want to access data that is stored in the cloud. For Azure these files are stored in Blob Storage. For Frank and Dana's  application from Dana and Frank, Frank will need to know how we will be able to access Blob Storage from Ruby. Because eventually you might want to store large pieces of information in the cloud, it is important to also again understand the cost.


How to get the needed pieces from the Azure Portal
To be able to access a piece of blob storage you will need to know the account name, the access keys and the container name. When you go to the Azure portal, you can select Storage accounts to get an overview of the storage accounts. When you click on one of the storage accounts you will get a view similar to the view below. This will help you to identify the pieces needed for your own example.


Initializing blob storage object from Ruby
When you want to access blob storage, make sure that you have the Azure gem installed. Next write require ‘azure’ at the the beginning of your script. When you have gathered all these pieces of information, you will be able to initialize your blob storage object and you will also be able to define your connectionstring.


List the content of your blob storage
The easiest way to list your content from a blob container is by using the Azure portal. You can find an example of this below.


Accessing the content from a container from Ruby however is also straight forward.


The first puts will just write the blob storage objects and the second puts will actually write down the file names like you can see below.


Downloading the files
Finally, it also might be the case that you want to download the files to a local drive or to another VM in the cloud. Below you can see the code for this.


Cost Analysis
Storage Cost
An overview of the blob storage prices can be found here. There is again a fixed cost and a variable cost for using blob storage. The fixed cost is just for hosting your data. The second cost is for accessing your data. The price for storing your data still depends on the amount of redundancy that you require and the amount of data that you are storing in blob storage. The last aspect is whether you want fast or hot access or slower or cool access to your data. All these different combinations, result in the price for storing your data ranging from 0.01 USD per gigabyte per month till 0.046 USD per gigabyte per month.

Access Prices
For accessing your data there are differences between the blob/block operations and data retrieval and data writes. For the blob/block operations the cost is counted in number of operations except for the delete which is free. The data retrial is counted in gigabyte. But it is interesting to notice here that data retrieval and data writing from hot data storage is free. Finally if you would want to import or export large amount of data, there are also options using Azure hard drive disks.

Conclusion
We have learnt more in this blog about using blob storage with Ruby and the costs that are involved in it. It is important to understand the usage pattern for your data to make the best decision about which type of blob storage to use. In one of the next blogs we will show how blob storage can be used to call the web service that Dana generated from Azure Machine Learning Studio.